
Home/Software/InputConfig/Setup
Connect a controller to your Mac
Three steps, in order: connect the controller by cable or Bluetooth, grant Accessibility permission when macOS asks, then pick a preset and press Activate. You need macOS 14 or later. You do not need drivers.
This page has moved. The current version lives at the first-preset guide on inputconfig.com, which is kept up to date with every release.
On this page
Before you start
- macOS 14 or later. InputConfig 1.4 (28) runs on macOS 14 Sonoma and anything newer.
- No drivers. macOS handles the controller. InputConfig reads what macOS already has, plus a raw HID path for pads Apple's framework does not cover. There is nothing to install alongside the app.
- One permission. Accessibility, so the app can send keyboard and mouse events for you. That is the only prompt you will see. InputConfig deliberately does not use Input Monitoring.
- Free. Free on the Mac App Store, with no paid tier, no trial, and nothing locked behind a purchase. There is an optional tip jar and it unlocks nothing.
The three steps
In this order. Almost everyone who gets stuck is stuck on step two or step three.
-
Connect the controller
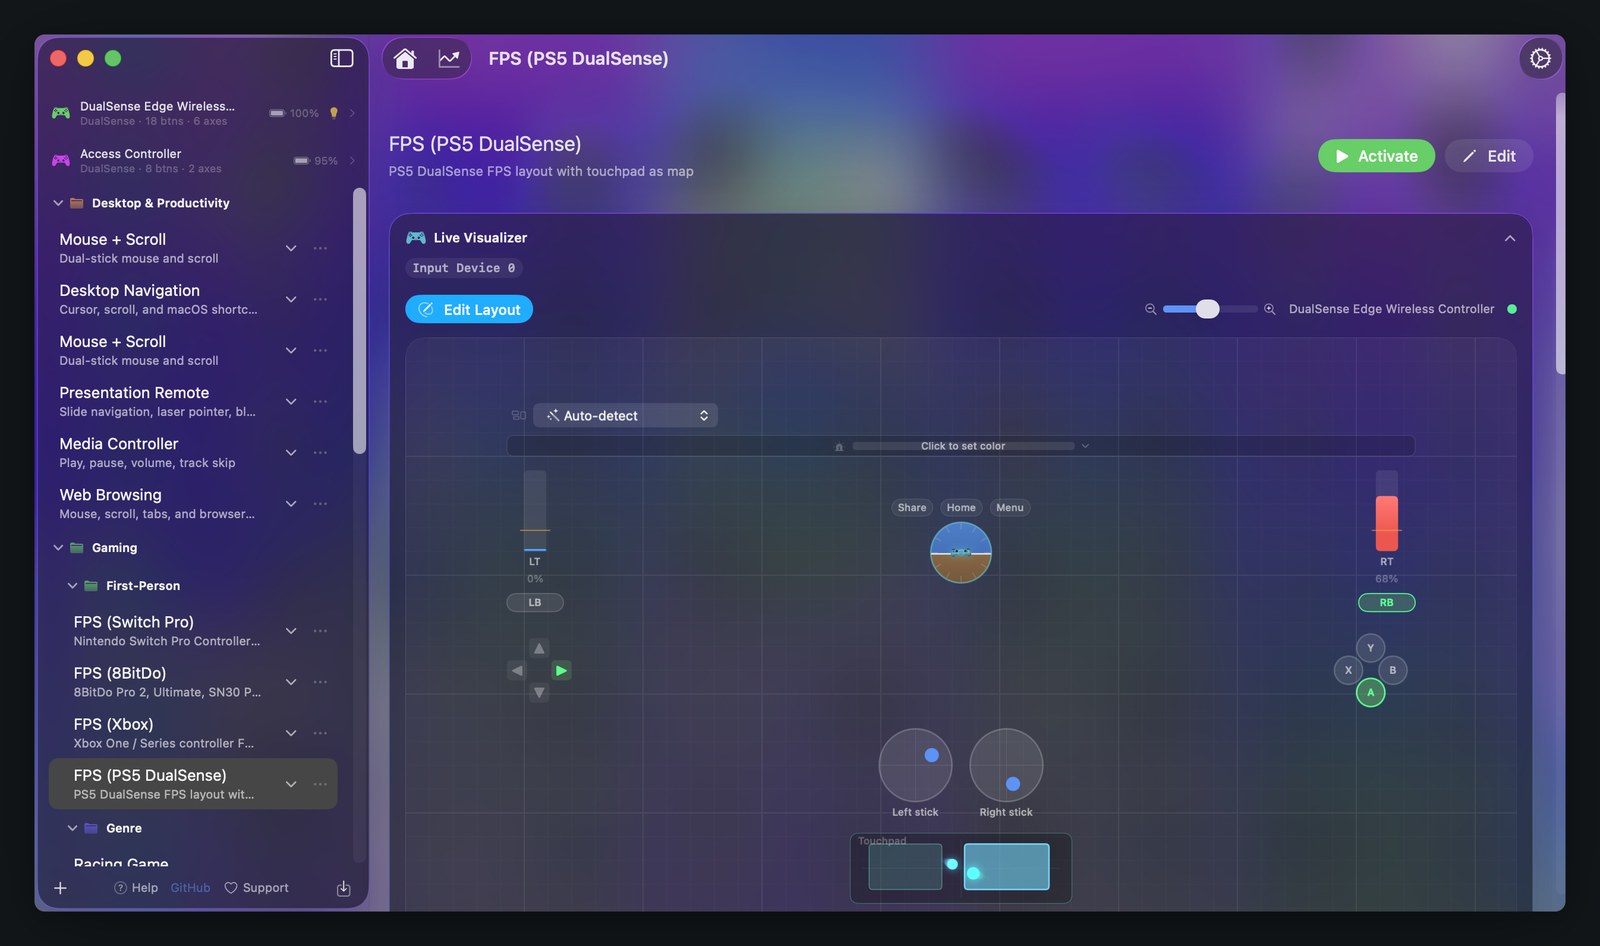
Plug it in with a cable, or pair it in System Settings, Bluetooth. Once macOS has it, InputConfig lists it at the top of the preset sidebar with its button and axis counts, and the Live Visualizer lights up as you press things.
If it does not appear within a few seconds, click the controller chip at the top of the sidebar and choose Refresh Controllers. Settings lists everything the app can currently see under Connected Controllers, including raw HID pads that Apple's framework never reports.
-
Grant Accessibility permission
Keyboard and mouse output has to be delivered to other apps, and macOS gates that behind Accessibility. InputConfig offers it on launch with a Turn On Accessibility panel, and the engine needs it the moment a preset starts sending keys or clicks.
The switch lives in System Settings, Privacy & Security, Accessibility. Turn on InputConfig there, or use the Open Accessibility Settings button in Settings, General, which also shows whether access has been granted. Accessibility is also what lets the app read your Mac's own keyboard and mouse as inputs, so a preset that uses those needs it too. A preset that only reads a controller and only sends MIDI, haptics, or spoken phrases runs without it.
-
Activate a preset
Selecting a preset in the sidebar is not the same as activating it. Selecting shows you what the preset does. Nothing is mapped until you press Activate, which is the green button with a play icon at the top of the preset.
While a preset runs, that button reads Deactivate instead. The menu bar item is the other place to check: it says Engine running with the polling rate next to it, or Engine idle when nothing is mapped.
Learn the way out before you need it
An active preset can take over your keyboard and mouse. The emergency stop only ever stops, so it is safe to use when you are not sure what is happening. It works three ways: Control Option Command . from anywhere on the Mac, a two second hold by default on Home, PS, or Guide on any connected controller, or Emergency Stop in the menu bar. The controller hold works no matter what the running preset maps that button to. What it releases, and what to do when a game swallows the keyboard shortcut, is covered by the emergency stop, in full.
Connecting by cable or Bluetooth
Connecting by cable
Plug the controller into your Mac with a USB-C cable. Most modern controllers, including the DualSense, the DualSense Edge, and Xbox controllers, work this way with no setup at all. A cable is also the quickest way to rule out a pairing problem, and a few controllers are wired-only cases on a Mac: the 8BitDo Ultimate 2C in its default XInput mode and the DualShock 3 both report over USB.
If InputConfig does not list the controller after a few seconds, click the controller chip at the top of the preset sidebar and choose Refresh Controllers.
Connecting by Bluetooth
- Put the controller into pairing mode. On a DualSense, hold the PS button and the Create button together until the light bar starts flashing.
- On your Mac, open System Settings, Bluetooth.
- Wait for the controller to appear under nearby devices, then click Connect. It moves to My Devices once it pairs.
- InputConfig detects it within a few seconds of the pairing finishing.
Two rules save most of the trouble here. A controller pairs with one host at a time, so if it is still paired to a PlayStation, an Xbox, or a Switch, unpair it there first. And put one device into pairing mode at a time, so the nearby devices list has one candidate in it.
Controller by controller
What each family needs the first time you connect it. Symptoms that appear after it was working belong on the troubleshooting page.
- PlayStation DualSense and DualSense Edge
- Either connects by USB-C cable with no setup, or over Bluetooth by holding PS and Create until the light bar flashes. The touchpad, the light bar, and the motion sensors all work. On the Edge, both back paddles, both FN buttons, and the mute button are bindable like any other input, over Bluetooth and over USB: Apple's controller framework does not report them, so InputConfig reads them from the controller's own data stream. The paddles are detachable, and an empty rear socket reports nothing at all.
- PlayStation DualShock 4 and DualShock 3
- The DualShock 4 connects by cable or over Bluetooth and keeps its touchpad, light bar, and motion sensors. The DualShock 3 predates Apple's controller framework, so InputConfig reads it directly as a raw HID device. Connect that one with a cable.
- Xbox Wireless
- Xbox One, Series S and X, and Elite controllers connect by cable or pair over Bluetooth with no setup. There is no light bar, touchpad, or motion sensor on these, so those binding types have nothing to read. Everything else, including the triggers as analog axes, works as normal.
- Nintendo Switch Pro
- macOS 13 and later supports it natively. Hold the small Sync button on the top edge, next to the USB-C port, until the four player LEDs run back and forth, then connect it from System Settings, Bluetooth. Two things to expect. The Switch labels the bottom face button B and the right one A, the opposite of Xbox and PlayStation, and InputConfig binds by logical index, so a preset built for an Xbox pad may want those two rows re-scanned. And macOS does not expose the Pro Controller's motion sensors, so gyroscope bindings do not work on it. Buttons, sticks, and standard rumble do. If it will not pair, unpair it from the Switch first, under System Settings, Controllers and Sensors, Disconnect Controllers.
- Nintendo Joy-Cons
- Each Joy-Con pairs on its own. Detach them from the console, hold the small Sync button on the rail side of each until the LEDs run back and forth, then connect Joy-Con (L) and Joy-Con (R) separately in System Settings, Bluetooth. Both then appear separately in InputConfig, and a single Joy-Con held sideways reads as a small gamepad with four face buttons and two shoulder buttons. On macOS 13 and later the two may also show up together as a combined Joy-Con Pair. Bindings do not carry between a single Joy-Con and the pair, so pick one arrangement per preset and stay with it. The IR camera, NFC, accelerometer, and gyroscope are not exposed to macOS, so buttons and the small sticks are what you have to work with.
- 8BitDo
- Most 8BitDo controllers have a mode switch on the back with the positions S, X, D, and A. A is Apple mode, and it is the one to use on a Mac: turn the controller off, slide the switch to A, turn it back on, and reconnect. InputConfig also reads XInput (X) and DirectInput (D) directly over raw HID, so most models still map in those modes and appear under Connected Controllers in Settings. Models with no switch use a button held at power-on instead, usually B while pressing Start for Apple mode; check your model's manual. The Ultimate 2C wired model is the exception: it has no Apple mode and no switch, and InputConfig 1.3 and later reads it in its default XInput mode over USB, so plugging it in is the whole setup. Apple mode support was added or improved in 8BitDo firmware released after early 2023, and the models 8BitDo lists for Apple mode are the Pro 2, Ultimate (Bluetooth and 2.4G), SN30 Pro+, Pro, SN30 Pro, and Lite SE. If the controller connects but the buttons do nothing, see my 8BitDo controller's buttons are not registering.
- Google Stadia
- The Stadia controller has to be unlocked before it will pair with anything other than Stadia itself, using Google's own Bluetooth update tool. That unlock is permanent. Afterwards, hold the Stadia, Y, and A buttons together for two seconds until the status light pulses, then click Connect in System Settings, Bluetooth. It follows the Xbox layout, A on the bottom and Y on top, so a preset built for an Xbox controller works on it unchanged.
- Valve Steam Controller
- InputConfig reads the Steam Controller directly over raw HID, wired or through its wireless dongle, and it appears as its own slot named Steam Controller, at the joystick index just past your last MFi controller. Both trackpads, both grip paddles, and the Steam button are all readable. Quit Steam before you use it, or unbind the controller in Steam's settings: both apps try to control the pad's built-in keyboard and mouse emulation, and if they fight over it you will see the input flicker.
- PlayStation Access Controller
- It presents to macOS as an ordinary HID gamepad, so there is nothing special to install and no driver to find. No built-in preset is built for the Access Controller, so start from whichever preset suits the layout you have set up and re-scan the rows you need. Two things are worth doing early: turn on one-stick driving if you drive from a single stick, and bind one switch to Emergency Stop so there is always a way to stop everything. The app also carries a help guide for this controller. If it connects and no button does anything, the cause is usually a profile stored on the controller itself: see my Access Controller connects but no buttons respond.
- Other HID gamepads
- Anything macOS recognizes as MFi works with no setup, including official Made-for-iPhone gamepads. Generic USB pads, fight sticks, wheels, and Logitech F-series pads with their switch on D report as raw HID devices, which InputConfig reads directly, and they appear under Connected Controllers in Settings. A controller that still does not show up is most likely sitting in a vendor-specific mode that a sandboxed app cannot read, so try another position on its mode switch if it has one.
Your first preset
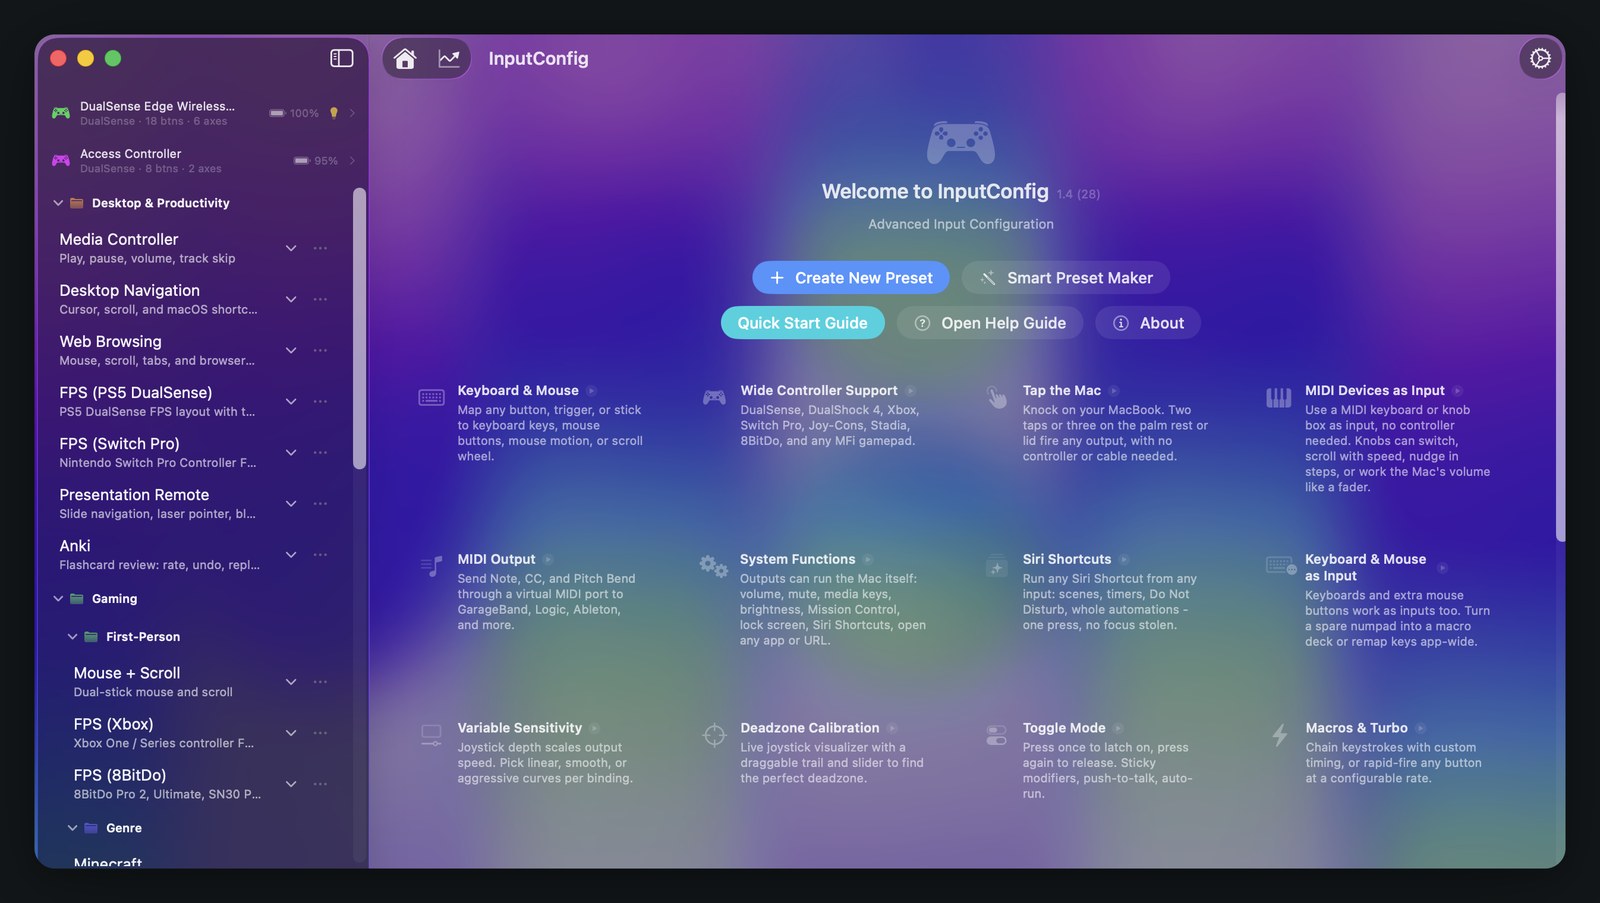
InputConfig seeds 31 built-in presets into the sidebar the first time it runs, already sorted into folders. They are working presets rather than demos, and they are yours to edit or duplicate, so nothing has to be built from an empty list on day one.
For a first run, take one from the Desktop & Productivity folder, because you can tell immediately whether it is working. Desktop Navigation puts the cursor on one stick, scrolling on the other, and common macOS shortcuts on the face buttons. Mouse + Scroll is a plainer dual-stick mouse. Media Controller maps play, pause, and volume. Pick one, read down its bindings so you know what each button is about to do, then press Activate.
If the preset uses motion or the controller touchpad, calibrate before you judge how it feels. Both calibrators sit on the toolbar along the bottom of the binding editor, as Calibrate Touchpad and Calibrate Motion, and a pad or a sensor the app has never seen on your particular controller is the usual reason a preset feels wrong on the first run. A preset built only around the Mac's own trackpad, a cursor region, or a tap on the case needs no controller connected at all, so those are worth trying even with nothing plugged in.
To change a row, press Edit, press Scan on that row, then press the control you want on the controller. It captures whatever you press, so no key codes have to be looked up. The full vocabulary of what a row can send is on the page about how to map a controller button to a keyboard shortcut.
If none of the built-in presets are close to what you want, open Smart Preset Maker from the welcome screen and answer its questions instead of starting from a blank preset. The preset library, the Smart Preset Maker, and per-app switching are covered in full on the presets page, including what is in each folder and how to make a preset activate itself.
If it still does nothing
Three checks cover most of it. Accessibility is granted in System Settings, Privacy & Security, Accessibility. The controller is actually connected, and in the right mode if it has a mode switch. And a preset is activated rather than only selected. If all three are true and your Mac still does not respond, the troubleshooting page is organised by symptom:
- The controller does not show up at all
- The controller shows up but nothing happens when I press a button
- I granted Accessibility permission and it still does not type
- A preset has taken over my keyboard and mouse and I cannot stop it
- The same controller appears twice
Everything else about the app, from bindings to MIDI to release notes, is indexed on the InputConfig documentation hub, and the product overview covers what the app is for.
Source and links
- Mac App StoreDownload InputConfig 1.4, free, macOS 14 or later
- InputConfig documentationEvery guide in the cluster, in one index
- Controller not working on MacSymptom by symptom fixes
- Bindings and outputsEverything a control can send
- Presets and per-app switchingFolders, shortcuts, and the Smart Preset Maker
- Source code on GitHubThe full app, open under the MIT license
- Support[email protected]