
Home/Software/InputConfig/Accessibility
Adaptive controllers on your Mac
The PlayStation Access Controller works with InputConfig, and so does anything else that presents as an MFi or HID gamepad. No drivers. What comes out the other side is real keyboard and mouse input, so software that never planned for a controller still responds to it.
This page has moved. The current version lives at the accessibility guide on inputconfig.com, which is kept up to date with every release.
Does it work
Yes. InputConfig works with the PlayStation Access Controller on any Mac running macOS 14 or later, and with anything else macOS already sees as a gamepad. There are no drivers to find and nothing to install except the app.
The Access Controller presents itself to a Mac as a standard HID gamepad. You connect it the same way you would connect a DualSense, by cable or over Bluetooth, and InputConfig reads it the same way it reads any other gamepad. Whatever the controller's active on-device profile assigns to a control, a switch on an expansion port included, arrives at the Mac as an ordinary button and binds like any other input.
What comes out the far side is the part that matters. InputConfig does not pretend to be a second gamepad. It sends real keyboard events, real mouse movement, and real clicks, the same ones a keyboard and mouse on the desk would send, so Mail, Safari, a text editor, and a game that only listens for W, A, S, and D all respond to it. Software that never planned for a controller still answers to one. The limit is the other side of the same fact: a game that accepts only a gamepad and ignores the keyboard and mouse is out of scope.
The same holds for the Xbox Adaptive Controller. Nothing in InputConfig is written for it by name, and it does not need to be: if macOS presents it as a gamepad, InputConfig reads it as one, and everything on this page applies to it unchanged.
What is not in the box
There is no built-in preset named for the Access Controller, and none built for adaptive hardware in general, so do not go hunting for one. What exists instead: one-stick driving, a help guide for the Access Controller profile problem, the ability to give any control its own emergency stop, and two workflow profiles in the Smart Preset Maker called Accessibility Pointer and One-Handed Cursor. Every one of those is covered below.
On this page
One-stick driving
Steer, accelerate, brake, and shift between Drive and Reverse, all from a single stick.
One-stick driving turns one analog stick into a whole vehicle control scheme, the way a power wheelchair drives. Left and right steer. Pushing forward accelerates, pulling back brakes. Nothing else needs to be reachable.
Variable throttle is the interesting part, because the output is a keyboard. InputConfig pulses the accelerate key on and off very quickly, and how far you push the stick decides what share of each cycle the key is held down. Most games read that as proportional speed. A Pulse smoothing slider sets how fine that pulsing is. Steering leaves as smooth mouse movement by default, and you can switch it to two keys instead, A and D unless you pick different ones.
Turning it on
Open the panel
Open a preset in the editor and scroll to the One-Stick Driving panel, just below the joystick groups, then switch it on. The fastest start is the One-Stick Racing profile in the Smart Preset Maker, which arrives with the panel already configured.
Pick the stick
Choose Left, Right, or a custom pair of axes, and set the controller slot. Move the stick and watch the live axis readout to confirm the right axes are responding. If you are not sure which axis number is which, move the one you want and press Set steering to most-moved axis, then do the same for the throttle.
Set the deadzone and the direction
Raise the deadzone until resting movement stops registering. If pushing up drives backward, turn on Invert throttle.
Match the output to the game
Set the accelerate and brake keys to whatever the game expects, W and S by default, then choose how steering leaves: mouse steering, which is analog and suits anything with mouse look, or two keys for games that need them.
Try it in the arena
The Test Drive grid at the top of the panel runs a small vehicle on the exact settings below it, with a Drive or Reverse badge and a speed percentage. Changes apply instantly, so you can feel a deadzone or a curve before taking it into anything real. If no controller is connected, drag the on-screen virtual stick instead.
Shifting into Reverse
Snap the stick fully back to the wall twice, quickly. Out of the box that means two taps inside 700 milliseconds, with the wall starting at 85 percent of full travel, and the number of taps, the window they have to land in, and how far back counts as a wall hit are all adjustable.
While in Reverse, the same forward push sends the reverse key rather than the accelerate key, so the vehicle backs up. That key defaults to the brake key, S, which many games treat as reverse once you have stopped, and it can be set to anything. Push all the way to the forward wall and you are in Drive again. The gesture is unavailable when the throttle axis is set as a trigger, because a trigger has no backward pull.
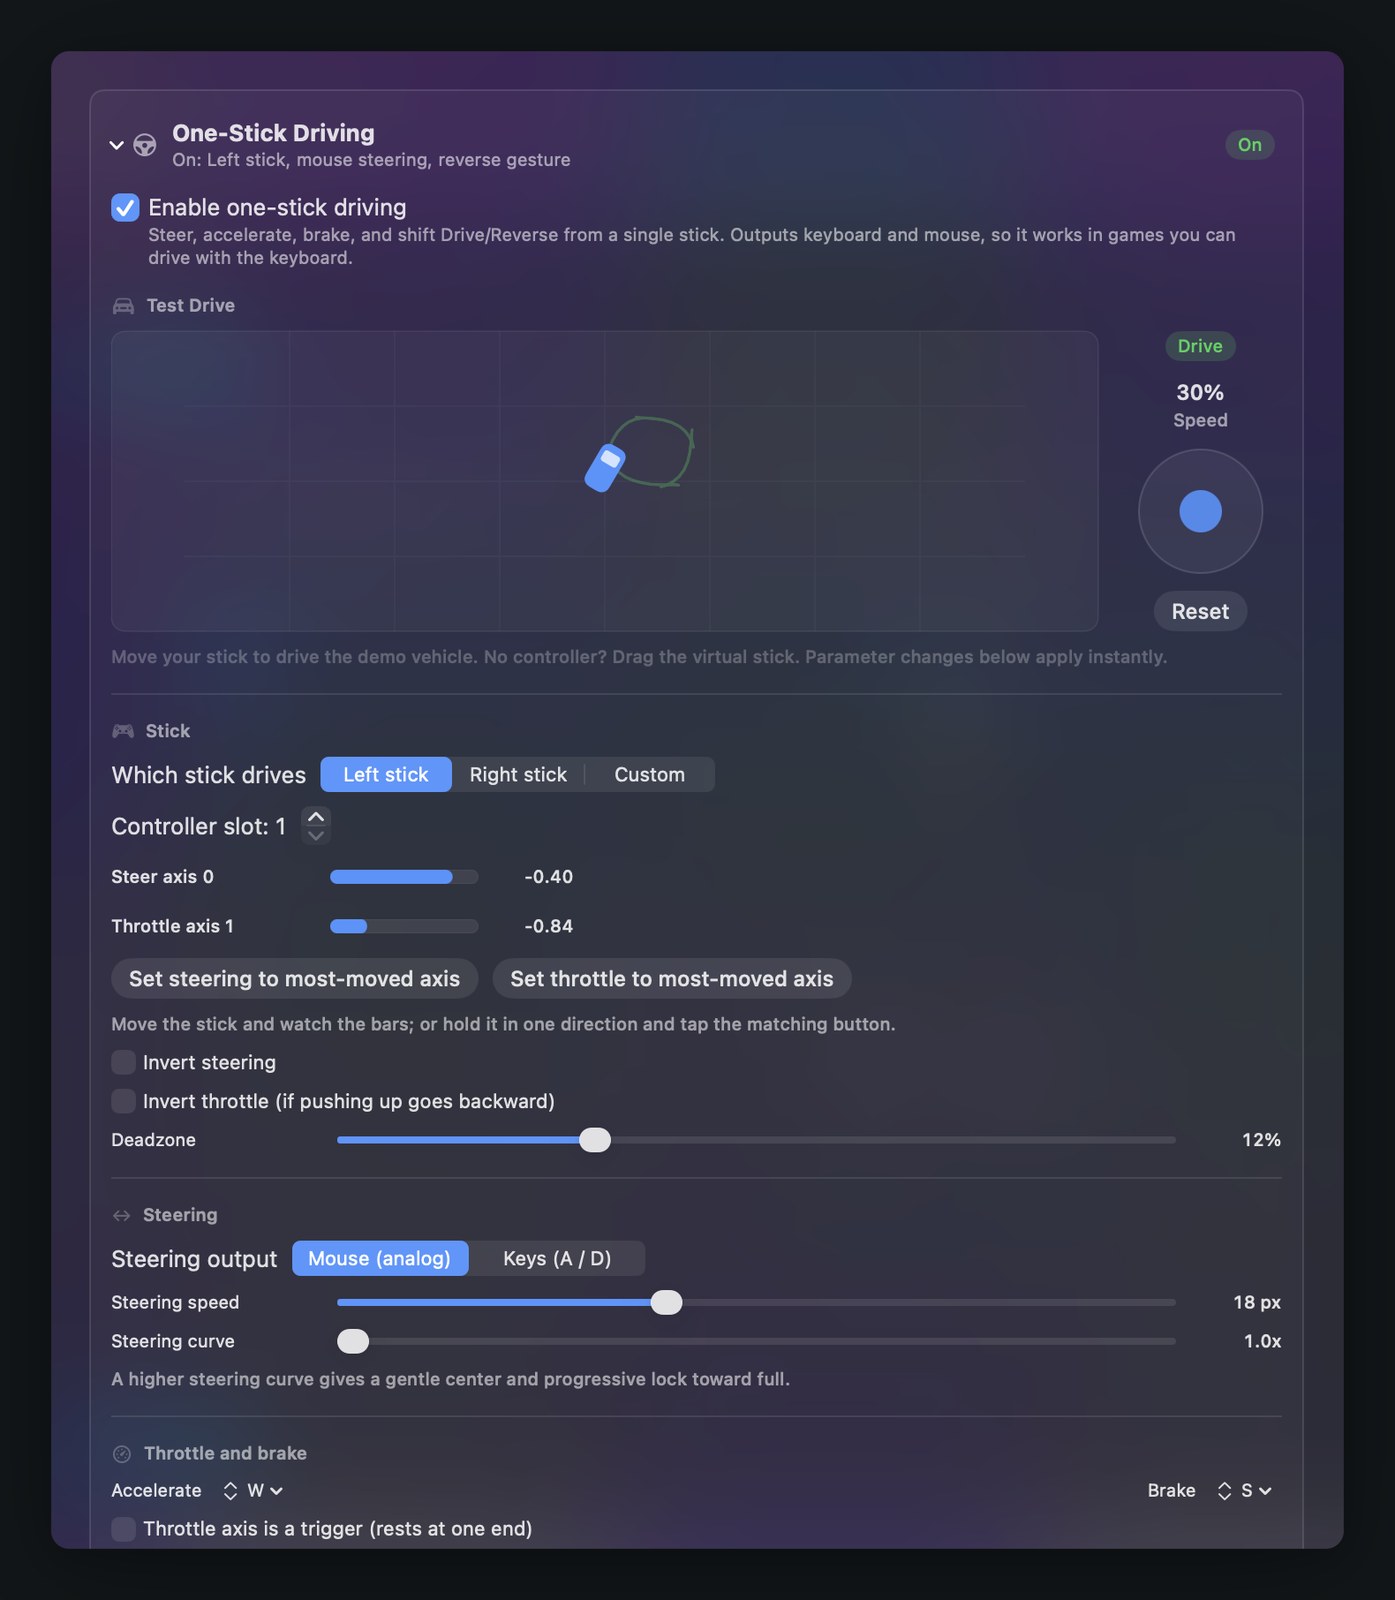
Every setting in the panel
| Setting | What it does | Range or default |
|---|---|---|
| Which stick drives | Left stick, right stick, or a custom pair of axes, on a chosen controller slot | Left stick |
| Set steering or throttle to most-moved axis | Assigns whichever axis you are currently pushing furthest, so you never have to guess an axis number | Buttons |
| Invert steering, Invert throttle | Flips either direction | Off |
| Deadzone | How much movement around centre is ignored before the vehicle responds | 0 to 40 percent, starts at 12 |
| Steering output | Mouse steering, which is analog, or two keys | Mouse |
| Steering speed | Mouse steering only. Higher moves the pointer further for the same stick position | 4 to 40 px, starts at 18 |
| Steering curve | Higher gives a gentle centre and progressive lock toward full | 1.0x to 3.0x, starts at 1.0x |
| Accelerate and brake keys | Which keys the throttle pulses | W and S |
| Throttle axis is a trigger | For a throttle mapped to an analog trigger, which rests at one end instead of the centre | Off |
| Brake when centered | Holds a light brake while the stick sits at centre, so the vehicle slows instead of coasting | Off |
| Slow-down strength | How hard that centred brake is held. Only appears once Brake when centered is on | 10 to 100 percent, starts at 50 |
| Sensitivity curve | Higher gives finer control at low speed | 1.0x to 3.0x, starts at 1.0x |
| Pulse smoothing | How smooth the on and off pulsing of the accelerate key is, measured in engine ticks per cycle | 3 to 12, starts at 6 |
| Reverse gesture | Snap fully back a set number of times to shift into Reverse | On. 2 to 4 taps, within 300 to 1500 ms, wall at 60 to 98 percent |
| Reverse key | Which key the throttle pulses while the gear is Reverse | S, the same as the brake |
If the vehicle launches the moment you enable drive, the throttle axis is almost certainly an analog trigger resting at one end; turn on the trigger option and it settles.
If the Access Controller sends nothing
Connected, charged, lights on, and not a single button registers. This is the most common Access Controller problem on a Mac, and it is worth naming here because the cause is not in the app and not in the cable.
The Access Controller holds up to three profiles on the device itself. If the profile that is currently active was set up on a PlayStation console with some or all buttons left unmapped, those buttons transmit nothing at all to a Mac. The hardware is doing exactly what it was told. It is sending nothing because the profile says to send nothing, and no setting inside InputConfig can change that.
The fix is a short sequence: cycle the profiles, test after each one, and go back to a PlayStation 5 if none of the three respond. It is written out step by step on the troubleshooting page under my Access Controller connects but no buttons respond, along with what to confirm in the console's Access Controller settings and how to keep one profile permanently set up for Mac use. The same sequence ships inside the app as a help guide, Access Controller Sends No Input, under Help Guides, so it is readable without a second device to read it on.
Accessibility outputs, new in 1.4
Five macOS accessibility features you can put on a button, without rebuilding a key combination by hand.
In the binding editor, set a row's output type to System Function and open the Accessibility group. Version 1.4 added these five as first-class outputs. Each one needs its macOS feature switched on first, and the picker states the requirement under the name so you are not left guessing why a button does nothing.
- Start Dictation
- One press starts dictation, the next press stops it. InputConfig presses the dictation key itself rather than reconstructing a shortcut, so it follows whatever your dictation setting is and keeps working if you change it later. Needs Dictation switched on in System Settings, Keyboard.
- Speak Selection
- Reads the currently selected text aloud. Needs Speak selection switched on in System Settings, Accessibility, Spoken Content.
- Zoom On / Off
- Turns screen zoom on and off. Needs Use keyboard shortcuts to zoom switched on in System Settings, Accessibility, Zoom.
- Zoom In
- Zooms in one step. Same requirement as Zoom On / Off.
- Zoom Out
- Zooms out one step. Same requirement as Zoom On / Off.
System functions fire on press and have no release half, so they suit a button rather than something you hold. The five other System Function groups, Sound, Media, Display, Mac, and Automation, and every other kind of output InputConfig can send, are listed on the bindings reference.
Tuning it to how you move
A control that fits badly is usually fixable in software. Every binding carries its own deadzone, curve, and inversion settings, so one stick can be tuned without touching anything else in the preset.
Inner and outer deadzone
The inner deadzone is how far the control has to move before anything happens at all. Raise it and a stick that does not rest exactly at centre, or that moves when you did not mean it to, stops producing output. It runs from 0 to 90 percent, and starts at 25 percent.
The outer deadzone is the opposite end: the point at which the control counts as fully pushed. Lower it and a stick that only travels part of the way still reaches full output, so the cursor gets across the screen without the stick ever reaching the rim. It runs from 10 to 100 percent.
Both are set on a live plot rather than by guessing. The stick version draws a trail of everywhere the stick has actually been, with Current and Peak readouts and a plain yes or no for whether the control is inside the deadzone right now. The trigger version is a vertical bar, and since 1.4 the red inner band stays visible while you pull, so you can see the exact point where a resting trigger stops counting as pressed.
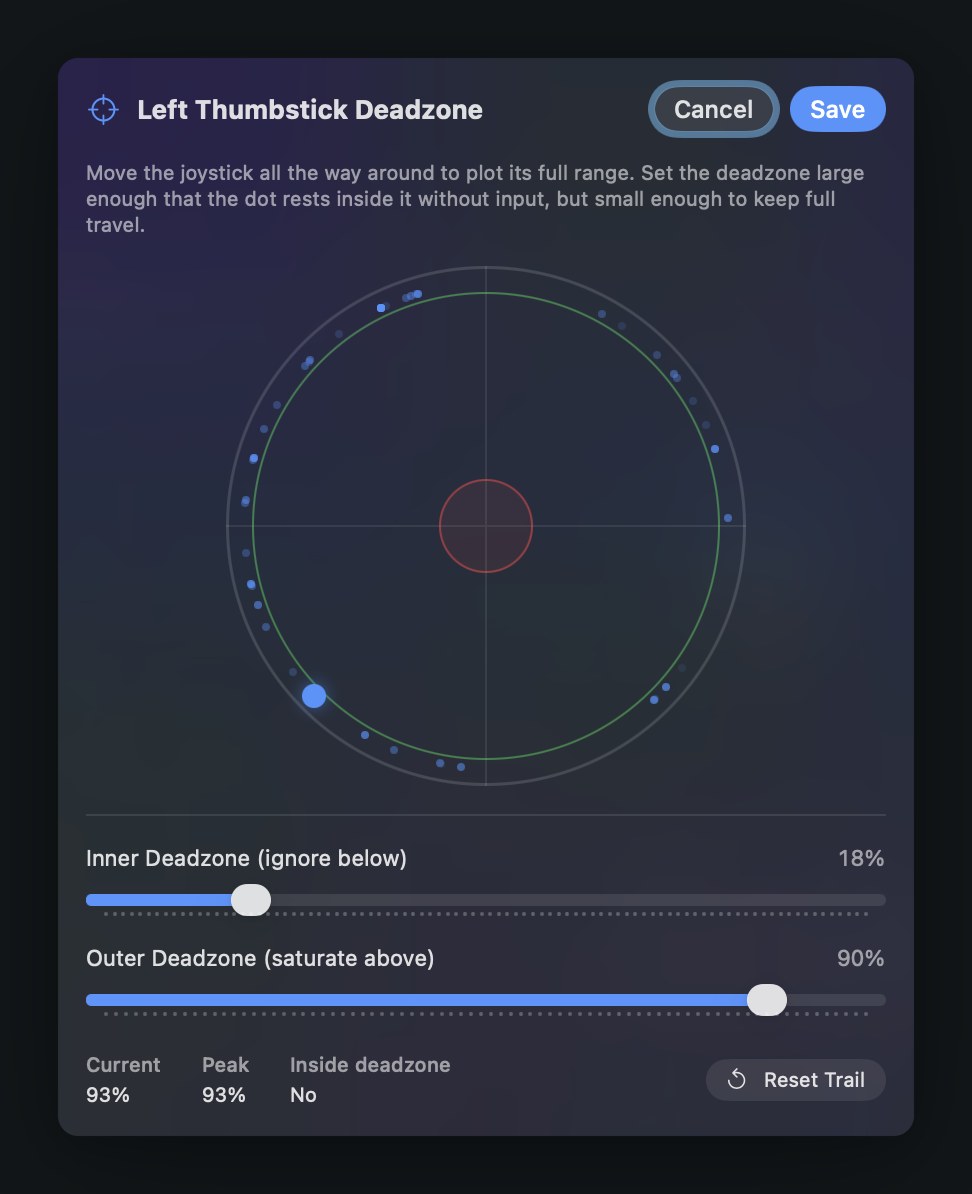
Curves and variable sensitivity
Sticks and triggers report a continuous value, not just pressed or not pressed, and a binding can use that depth in two ways.
Variable sensitivity multiplies mouse movement and scroll speed by how far the control is pushed, so a small tilt moves the pointer a little and a full push moves it a lot. It makes an axis feel closer to a real mouse than a fixed-speed binding does.
The sensitivity curve then decides how that scaling is shaped, and which of the three to pick follows from the movement you have rather than from any rule in the app. Smooth is for the case where the travel is there but small movements have to land exactly, since it keeps the slow part near the centre and saves the speed for the outer travel. Aggressive is for the opposite case, a control whose useful range is short and has to do a lot with a little. Linear is the one to leave alone when neither problem applies. The bindings reference defines all three alongside the other per-binding options.
Invert axis flips the direction of a single binding, which matters when a control is mounted rotated, upside down, or on the other side of a chair from where its designer assumed.
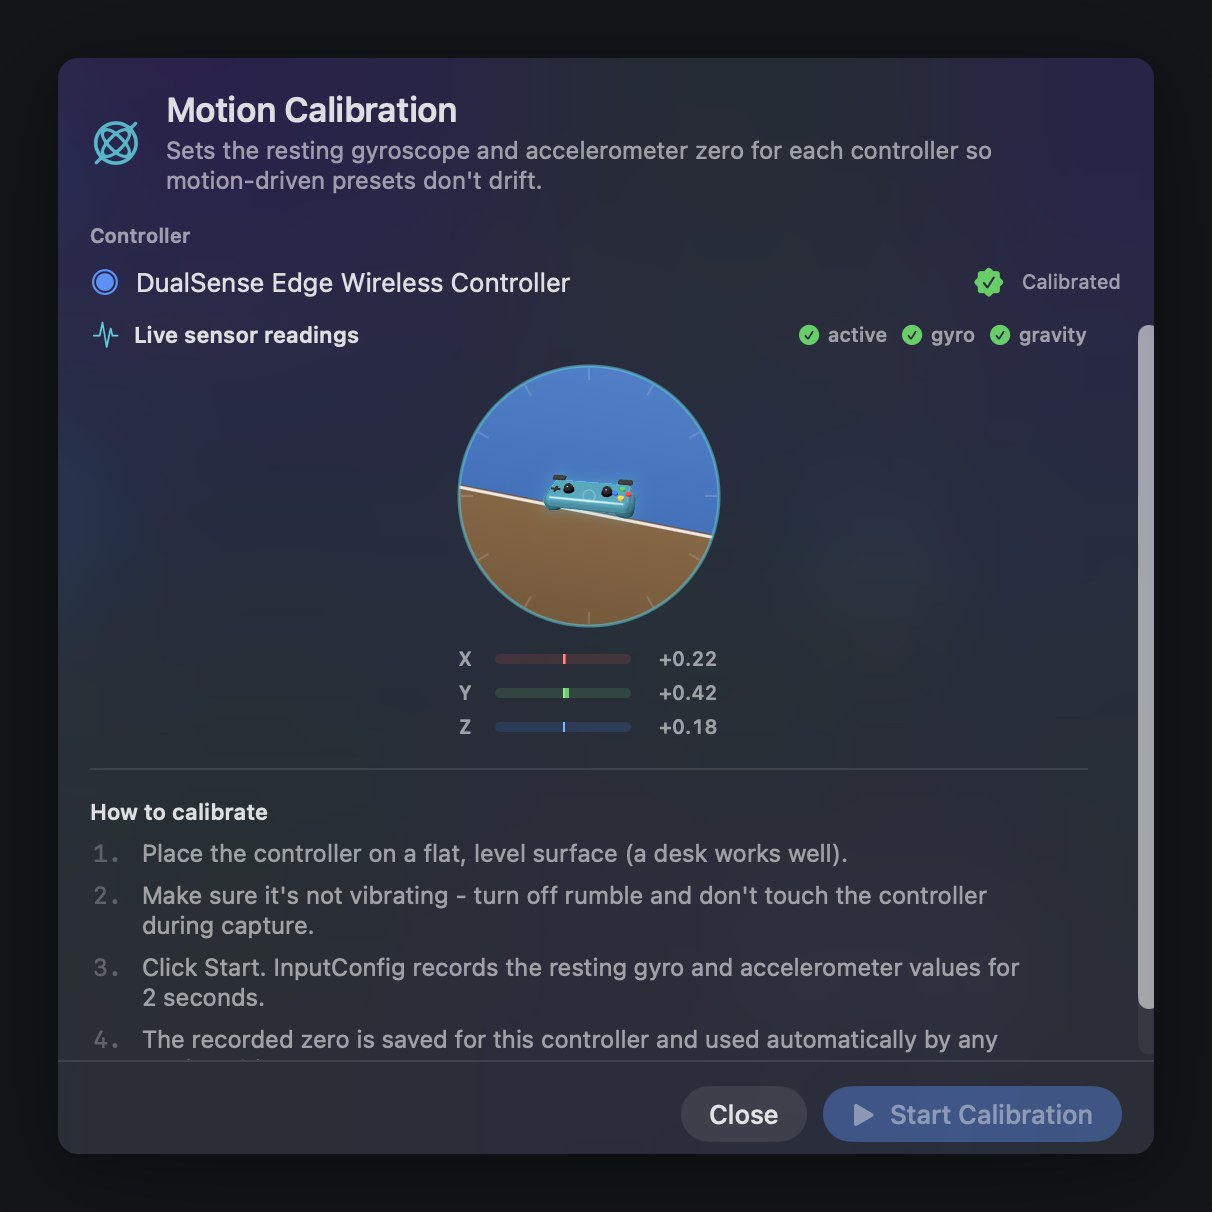
Getting out of a preset
The safety net that makes the rest of it safe to experiment with.
An active preset can take over the keyboard and the mouse. That is the point of it, and it is also the obvious risk: if a binding turns out to be wrong, the thing you would normally use to fix it is the thing that has been taken over. The emergency stop exists for exactly that moment, and it only ever stops. It never turns a preset on, so there is no cost to using it when you are not sure what is happening.
When it fires, it halts the polling engine first so nothing can be pressed again on the next frame, then releases every key and mouse button InputConfig is holding down, sends a note off for every MIDI note it is holding plus an all-notes-off on all sixteen channels, clears any cursor confinement the preset had set, and makes the pointer visible again.
Four ways to trigger it
The keyboard shortcut
Control Option Command . from anywhere on the Mac, by default. Period is the Mac's cancel key and the three modifiers keep it clear of anything an app or a game is likely to want. You can change it in Settings, General.
Holding a button on the controller
Hold Home, PS, or Guide for two seconds. This is the one to remember. It works no matter what the active preset maps that button to, and it is watched on every connected controller slot, not just the first one, so the controller in your hands is always a way out. Both the button and the hold time are configurable.
The menu bar
Click the InputConfig icon in the menu bar and press Emergency Stop.
A binding of your own
In the binding editor, set a row's output type to App Action and choose Emergency Stop. That control then stops everything the instant it is pressed. On the Access Controller a dedicated switch is the natural choice here, because it is one deliberate action with no timing and no combination to get right, which is more than the other three can say.
Of the four, the keyboard shortcut is the only one that can be taken away from you: another app can already own the chord, and a full-screen game with exclusive input can swallow it. The other three run inside InputConfig's own polling loop and never depend on the system delivering a keystroke. That is why the controller hold is on by default, and it is why a switch bound straight to Emergency Stop is worth spending a control on. What to do when the shortcut does nothing is on the troubleshooting page.
Other things that help
Two starting points that are not presets
The Smart Preset Maker builds a preset when you ask for one rather than shipping it in the sidebar, and two of the profiles it can build are about running the Mac itself rather than any particular app. Accessibility Pointer puts a slow, precise cursor on the left stick and a fast one on the right, so you are not fighting one speed for both jobs; the face buttons and the triggers hold the three mouse clicks, the D-pad scrolls in all four directions, and the Share or Select button opens Spotlight. One-Handed Cursor folds the same job onto one side of the pad: the left stick moves the pointer, the triggers click, the D-pad scrolls. Neither is fixed. Both open in the binding editor like anything else, so they are a first draft rather than an answer. How the Smart Preset Maker works is on the presets page.
The app's own accessibility settings
Under Settings, Accessibility, InputConfig carries four switches that apply to the app itself. Text Size scales every label, button, and row, with four steps from Default to Huge, and layouts reflow to fit rather than clipping. Bold Text renders everything at a heavier weight. Reduce Transparency replaces the frosted-glass window and sheet backgrounds with solid ones, so text never sits over whatever is behind the window. Reduce Motion stops the decorative animations without touching the live visualizer, which keeps showing real data. These sit on top of the system-wide settings in System Settings, Accessibility, which the app honours as well.
VoiceOver
The scan overlay announces itself when it opens, tells you what it is waiting for, and speaks what it detected once you press something. The binding editor's controls are labelled, so a row can be built and checked without reading the screen.
Cancelling a scan without a keyboard
A scan used to be cancelled with Escape, which is not much use if the keyboard is the problem. Version 1.4 added a real Cancel button to the overlay, clickable with whatever pointer you have.
Spoken and haptic confirmation
Any binding can speak a phrase when it fires. Type the phrase you want, or leave it blank and it speaks the input's short identifier instead, something like btn 0, which is terse but enough to confirm you pressed what you meant to press. Any binding can also vibrate on press, with an intensity slider, on controllers with full Core Haptics support; controllers with only basic rumble motors are skipped silently rather than failing loudly.
Spoken phrases play through whatever audio output the Mac is currently using. The app cannot pin speech to a controller speaker on its own, so if that is where you want it, choose the controller under System Settings, Sound, Output and the speech follows.
Tap the Mac
If holding or reaching a device is itself the barrier, a knock on the case is an input. InputConfig reads the Mac's own motion sensor, and a double or triple tap on the palm rest or lid can fire any output, with nothing plugged in. It needs a Mac that publishes that sensor: M2 and later, plus M1 Pro, M1 Max, and M1 Ultra. On a Mac without it, the feature simply does not appear. Full details, including how the counting works, are on the Tap the Mac page.
Hardware and software, same problem
Rockstar Health makes adaptive hardware alongside the software, and the two ends meet on the same problem: the standard control does not fit every hand. A wheelchair joystick topper solves it in plastic, by replacing the knob with a shape you can actually drive. InputConfig solves it in software, by changing what a control does once it moves.
Plenty of setups need both. If the barrier is the shape of the thing you are holding, start with the topper. If the barrier is what the Mac does when you move it, start here.
Source and links
- Mac App StoreInputConfig 1.4, free, macOS 14 or later
- InputConfig documentationEvery guide in one index
- InputConfig overviewWhat the app is and what it does
- SetupPairing, permissions, and your first preset
- Bindings referenceEvery input and every output type
- TroubleshootingAccess Controller profiles and other symptoms
- Tap the MacInput with no hardware at all
- Goalpost joystick topperThe hardware side of the same problem
- Source code on GitHubThe full app, open under the MIT license
- Support[email protected]